General Electric Clothes Washer Repair Manual: A Comprehensive Guide
This guide offers detailed instructions for GE washer repair, covering models from basic to Profile, utilizing official and third-party manuals for effective troubleshooting.
Understanding GE Washer Models
General Electric offers a diverse range of washing machine models, each with unique features and complexities. From traditional top-load agitator washers to high-efficiency front-load Profile series, understanding the specific type is crucial for repair.
GE washers boast customizable wash cycles and pre-programmed settings for various fabrics. Newer models often incorporate smart technology and advanced sensors. Recognizing the differences – agitator vs. impeller, direct drive vs. belt drive – impacts diagnostic approaches.
GE has a long history in appliance manufacturing, resulting in a wide array of models over the years. Identifying the model’s generation helps pinpoint common failure points and locate appropriate repair resources. Familiarity with these variations streamlines the repair process.
Identifying Your Specific Model Number
Locating your GE washer’s model number is paramount for accurate repair information. This unique identifier unlocks access to the correct service manuals, parts diagrams, and troubleshooting guides. The model number is typically found on a label inside the washer cabinet, often around the door opening or on the rear panel.
Carefully note the entire number, as even slight variations signify different components and repair procedures. Websites like servicemanuals.net rely on this number to provide the precise manual for your appliance. Without it, you risk ordering incorrect parts or following inaccurate instructions.
Record the serial number too; it can be helpful for warranty verification and identifying manufacturing dates. This information ensures you’re using the most relevant repair resources available.
Accessing GE Washer Repair Manuals
Obtaining the correct repair manual is crucial for successful GE washer maintenance. Official GE service manuals provide detailed schematics, troubleshooting steps, and parts lists, ensuring accurate repairs. These are often available for purchase online through GE’s authorized service network or dedicated appliance parts retailers like servicemanuals.net.
Alternatively, third-party repair manual resources offer a cost-effective option. However, verify the manual’s accuracy and compatibility with your specific model number. These resources may contain user-submitted information or generalized guides.
Always prioritize official manuals when possible, as they reflect GE’s recommended procedures and safety guidelines. Downloading manuals in PDF format allows for easy access and printing during repairs.
Official GE Service Manuals
Genuine GE service manuals are the gold standard for washer repair, offering unparalleled accuracy and detail. These manuals, created by GE’s engineers, include comprehensive diagrams, exploded views, and step-by-step instructions specifically tailored to each model. They cover everything from basic maintenance to complex component replacements.
Accessing these manuals typically involves purchasing them directly from GE’s authorized service parts websites or through reputable appliance parts distributors. While often requiring a fee, the investment ensures you have the most reliable information available.
Official manuals prioritize safety, outlining proper procedures and warnings to prevent injury or further damage to the appliance. They are invaluable for both DIY enthusiasts and professional technicians.
Third-Party Repair Manual Resources
Alongside official GE manuals, several third-party resources offer repair information for GE washing machines. Websites like servicemanuals.net provide downloadable manuals, often at a lower cost, though quality and completeness can vary. These resources frequently compile information from various sources, including user forums and repair guides.
However, caution is advised when using third-party manuals. Verify the manual’s accuracy and relevance to your specific model number. User forums can be helpful for troubleshooting common issues, but information should be critically evaluated.
Always prioritize safety and cross-reference information with official sources whenever possible. While convenient, third-party resources shouldn’t replace the reliability of GE’s official documentation.
Common GE Washer Problems & Troubleshooting
GE washers, while reliable, can experience common issues. A frequent problem is the washer failing to start, often due to a faulty lid switch, timer, or motor. Drainage issues are also prevalent, typically caused by a clogged drain pump or hose. Water leaks can stem from damaged hoses, a faulty water inlet valve, or a deteriorated tub seal.
Loud noises during operation often indicate a worn drive belt, damaged bearings, or loose objects within the drum. Troubleshooting involves visually inspecting components, testing electrical connections, and replacing defective parts. Referencing a repair manual is crucial for accurate diagnosis and repair procedures.
Washer Won’t Start
If your GE washer refuses to start, several factors could be at play. First, check the power supply – ensure the washer is plugged in and the circuit breaker hasn’t tripped. Next, inspect the lid switch; a faulty switch prevents operation for safety. The timer/control board might be defective, requiring testing or replacement. A burned-out motor is another possibility, necessitating a multimeter test to confirm functionality.
Before disassembling, consult your washer’s service manual for specific testing procedures. Remember to disconnect power before any inspection. Proper diagnosis is key to avoiding unnecessary part replacements.
Washer Won’t Drain
A GE washer failing to drain is a common issue, often stemming from a clogged drain pump. First, disconnect power and locate the pump – typically accessible from the front or rear of the machine. Inspect the pump for obstructions like lint, coins, or small articles of clothing. Secondly, check the drain hose for kinks or blockages. A faulty drain pump motor could also be the culprit, requiring a voltage test.
Consult the service manual for your specific model to locate components and understand testing procedures. Ensure the drain hose is properly positioned to prevent siphoning. Carefully remove any obstructions before retesting.
Washer is Leaking Water
Water leaks in a GE washer can originate from several sources; Begin by inspecting the water inlet hoses and connections for tightness and cracks. Check the drain hose connection to the standpipe, ensuring a secure fit. Internal leaks may stem from the tub seal, water pump, or detergent dispenser. Examine the pump for signs of corrosion or damage.
Refer to your washer’s service manual for detailed diagrams and component locations. A faulty door boot (on front-load models) can also cause leaks. Carefully inspect all hoses and connections, replacing any damaged parts. Always disconnect power before any inspection or repair work.
Washer is Making Loud Noises
Unusual noises during a wash cycle often indicate mechanical issues. Common culprits include a worn drive belt, failing drum bearings, or obstructions within the pump. A squealing sound might point to a slipping drive belt, requiring replacement. Rumbling noises during spin cycles often suggest worn drum bearings, necessitating a more complex repair.
Check for foreign objects – coins, buttons, or small items – lodged in the pump or between the inner and outer tubs. Consult your GE washer’s service manual for specific component locations and disassembly instructions. Always disconnect power before inspecting internal parts. Ignoring these noises can lead to further damage.
Essential Tools for GE Washer Repair
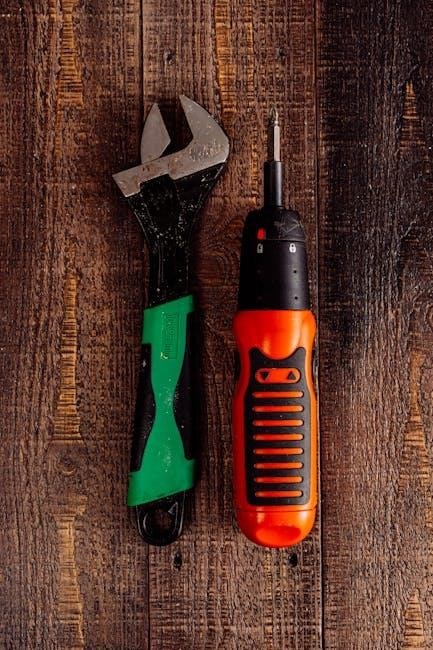
Successfully repairing a GE washing machine requires a specific toolkit. Essential items include a screwdriver set (Phillips and flathead), pliers, socket wrenches, and an adjustable wrench. A multimeter is crucial for diagnosing electrical issues, testing continuity and voltage. Specialty tools like a drum bearing puller and a belt removal tool can simplify complex repairs.
Consider acquiring a nut driver set for accessing fasteners in tight spaces. Safety gear – gloves and safety glasses – are paramount. A digital camera is helpful for documenting disassembly steps. Having the correct tools prevents damage to components and ensures a safer, more efficient repair process.
Safety Precautions Before Repairing
Prioritize safety before attempting any GE washer repair. Always disconnect the power supply by unplugging the washer from the electrical outlet. Turn off both the hot and cold water supply valves to prevent flooding. Be mindful of sharp edges on metal components during disassembly. Wear appropriate personal protective equipment, including gloves and safety glasses.
Never work on electrical components with wet hands or in a damp environment. If you are uncomfortable with electrical work, consult a qualified technician. Properly dispose of any damaged parts. Remember to ground yourself to prevent static discharge, which can damage sensitive electronic components.
Replacing Common GE Washer Parts
Replacing parts is often straightforward with the right guidance. The water inlet valve controls water flow; access it by removing the top panel and disconnecting hoses. A faulty drain pump prevents draining – locate it at the base and replace after disconnecting electrical connections. The drive belt, crucial for drum rotation, requires removing the front panel and carefully maneuvering the new belt onto the motor and drum pulleys.
Ensure you have the correct replacement part based on your model number. Always disconnect power and water before starting. Refer to your repair manual for specific instructions and diagrams. Double-check all connections after installation.
Replacing the Water Inlet Valve
Begin by disconnecting both the hot and cold water supply hoses from the rear of the washer. Next, remove the top panel to access the valve, typically held in place by screws or clips. Carefully disconnect the electrical connectors attached to the valve – note their positions for reassembly.
Remove the old valve by unscrewing it from the washer chassis. Install the new valve, ensuring a tight seal to prevent leaks. Reconnect the electrical connectors, matching their original positions. Finally, reattach the water supply hoses and the top panel. Test for leaks after restoring water and power.
Replacing the Drain Pump
First, disconnect the washer from the power supply. Then, locate the drain pump, usually at the bottom of the machine, accessible from the rear or front panel. Remove the access panel and any hoses connected to the pump – have a bucket ready for residual water.
Disconnect the electrical connector to the pump. Unscrew or unclip the old pump from its mounting. Install the new pump, ensuring it’s securely fastened and the hoses are correctly reconnected. Reconnect the electrical connector. Restore power and run a short drain cycle to verify proper operation and check for leaks.
Replacing the Drive Belt
Begin by disconnecting the washer from the power source. Access the drive belt, typically by removing the back panel of the washing machine. Locate the motor and the drive pulley connected to the wash basket. Release the tension on the belt by maneuvering the motor or a tensioning pulley – refer to your model’s service manual.
Remove the old, worn belt. Install the new belt, ensuring it’s correctly seated on both the motor pulley and the wash basket pulley. Verify proper alignment and tension. Reassemble the back panel and restore power. Run a test cycle to confirm the belt is functioning correctly and the washer is operating smoothly.
Diagnosing Electrical Issues
Electrical problems require caution; always disconnect power before inspection. Begin by checking the power cord and outlet for continuity. Utilize a multimeter to test the motor for winding continuity and shorts to ground. Inspect wiring harnesses for damage, loose connections, or corrosion.
Focus on the timer/control board, testing for voltage at various points during a wash cycle. Field service mode (if available – see manual) aids in component testing. Be aware of potential capacitor discharge hazards. If unsure, consult a qualified appliance technician; electrical repairs can be dangerous.
Testing the Motor
Before testing, disconnect power! Visually inspect the motor for burned windings or physical damage. Use a multimeter to check the motor windings for continuity – there should be resistance, but no shorts to the motor casing. Apply voltage (matching motor specifications) directly to the motor terminals to observe operation.
Listen for unusual noises or sluggish rotation. Check the motor’s centrifugal switch; it should open and close correctly during operation. If the motor fails to run or exhibits erratic behavior, replacement is often necessary. Refer to the service manual for specific testing procedures for your GE washer model.
Checking the Timer/Control Board
Begin by visually inspecting the timer or control board for burned components, swollen capacitors, or damaged traces. Use a multimeter to check for voltage at the appropriate test points during each wash cycle phase. Verify that the timer is advancing correctly through its cycle. For electronic control boards, check for error codes displayed – these can pinpoint the faulty component.
Carefully examine the wiring harness and connectors for corrosion or loose connections. If the board appears damaged or unresponsive, replacement is usually the most practical solution. Always consult the service manual for specific testing points and procedures relevant to your GE washer model.
Understanding GE Washer Error Codes
GE washers utilize error codes to signal malfunctions, aiding in diagnosis. Common codes include F01 (water inlet error), F02 (drainage issue), F03 (imbalance detection), and F04 (temperature sensor fault). These codes are displayed on the washer’s control panel or via flashing lights. Consult your specific model’s service manual for a complete list and detailed explanations of each code.
Error codes don’t always pinpoint the exact failed part; they indicate a system or component issue. For example, an F02 code could mean a blocked drain pump, a kinked hose, or a faulty control board. Utilizing a service manual and methodical testing are crucial for accurate diagnosis and repair.
Field Service Mode for Technicians
GE washers feature a Field Service Mode (FSM) designed to assist technicians in diagnosing issues efficiently. Accessing FSM typically involves a specific button sequence on the control panel, varying by model – consult the service manual for precise instructions; Within FSM, technicians can manually operate components like the water inlet valve, drain pump, and agitator, bypassing normal wash cycles.
This mode allows for isolated testing, confirming component functionality and identifying failures. Page 35 of some manuals (Profile and GE models) is specifically dedicated to FSM operation. Utilizing FSM significantly reduces diagnostic time and helps pinpoint the root cause of washer malfunctions, streamlining the repair process.
GE Profile Front Load Washer Recall (Safety Hazard)
A significant safety recall affects approximately 62,000 GE Profile front load washers sold nationwide from July onwards. The issue centers around a potential hazard where the washer drum can detach during a spin cycle, posing a serious risk of injury. Consumers are urged to immediately stop using recalled washers and contact GE for a free repair or replacement.
This recall highlights the importance of staying informed about appliance safety notices. Repair manuals do not address this specific defect, as it requires a structural modification. Checking the GE website or the Consumer Product Safety Commission (CPSC) website for recall information is crucial before attempting any repairs on a Profile front load washer.
Detergent Dispenser Issues & Solutions
Common problems with GE washer detergent dispensers include clogs, failure to dispense, and residue buildup. These issues often stem from using too much detergent, incorrect detergent type, or hard water deposits. To resolve clogs, remove the dispenser drawer and flush with warm water, using a small brush to dislodge residue.
If the dispenser isn’t releasing detergent, check for obstructions in the water inlet holes. For residue buildup, periodically run an empty hot water cycle with a washing machine cleaner. Repair manuals often detail dispenser disassembly for thorough cleaning. Always refer to your model’s manual for specific instructions and recommended detergents.
Troubleshooting Wash Cycles
When a GE washer’s wash cycle malfunctions, several factors could be at play. Cycles stopping prematurely often indicate issues with the timer or control board, requiring diagnostic testing as outlined in service manuals. Incorrect water temperatures suggest a faulty water inlet valve or thermostat. If a cycle won’t start, verify the door switch is functioning correctly.
Uneven washing or excessive vibration can point to an unbalanced load or worn suspension components. Refer to the washer’s error codes – detailed in the repair manual – for specific fault indications. Utilizing field service mode can aid in pinpointing component failures during cycle operation, streamlining the repair process.
GE Washer Installation Instructions (Review)
Proper installation is crucial for optimal GE washer performance and longevity. Reviewing the official installation manual – often available online as a PDF – is the first step. Ensure a level surface to minimize vibration and noise during operation. Connect the water supply hoses securely, checking for leaks after installation.

The drain hose must be positioned correctly to prevent siphoning. Electrical connections should be made by a qualified technician, adhering to local codes. Verify the washer is grounded properly for safety. Following these steps, detailed in the manual, will prevent common issues and ensure a trouble-free experience.
Finding Parts for Your GE Washer
Locating replacement parts for your GE washer is essential for successful repairs. Online retailers like servicemanuals.net often stock genuine GE parts, alongside numerous appliance parts suppliers. Always have your specific model number readily available – crucial for ensuring compatibility. Consider using the model number when searching online.
Local appliance repair shops can also source parts, offering expertise and potentially faster delivery. Beware of generic or non-OEM parts, as quality can vary. Compare prices from multiple sources before purchasing. Proper part identification prevents wasted money and ensures a correct repair, extending your washer’s lifespan.
Resources for GE Appliance Repair

Numerous online resources support GE appliance repair, supplementing repair manuals. Servicemanuals.net provides access to official GE service manuals for purchase, covering a wide range of models. YouTube hosts countless repair videos demonstrating common fixes. AppliancePartsPros.com offers parts, diagrams, and repair assistance.
GE’s official website features a support section with FAQs and troubleshooting guides. Online forums dedicated to appliance repair allow users to share experiences and seek advice. Remember to verify information from multiple sources. Professional appliance repair technicians are also available for complex issues, ensuring safe and effective repairs when DIY attempts fall short.
Additional Tips for Successful Repair
Before starting any repair, always disconnect the GE washer from the power supply to prevent electrical shock. Document the disassembly process with photos to aid reassembly. Utilize a multimeter to accurately test electrical components. Genuine GE replacement parts are recommended for optimal performance and longevity.
If encountering a complex issue, consult the field service mode for advanced diagnostics. Pay close attention to error codes, as they pinpoint specific problems. Remember safety precautions, especially when dealing with water and electricity. Consider professional help if unsure about any repair step, avoiding further damage or injury.